Gluten-Free Funfetti Layer Cake (Dairy-Free)
From Rachel Garofalo
Yield: 12 servings
Total Time: 1 hr | Prep: 1 hr | Inactive: 10 min | Cook: 25-35 min
Ingredients
Funfetti Layer Cake
¾ cup (175ml) dairy-free milk, room temperature
¼ cup (60ml) avocado oil
2 large eggs, room temperature
1 teaspoon pure vanilla extract
¼ teaspoon almond extract (optional, recommend)
2 cups (320g) gluten-free flour 1:1 baking blend *
1 ¼ cup (250g) granulated sugar
2 teaspoons baking powder
1 teaspoon fine sea salt
½ teaspoon baking soda
½ teaspoon xanthan gum **
(** Omit the xanthan gum if your gluten-free baking blend already contains it.)⅔ cup (151g) salted dairy-free butter, room temperature & cubed
(try to get soy free vegan butter = healthier for you)1 cup (192g) gluten-free sprinkles
Vanilla Buttercream
2 cups (454g) salted dairy-free butter
5 ½ cups (660g) powdered sugar
(5 ½ cups is super sweet, would recommend 3-4 cups instead)1 Tablespoon pure vanilla extract
1 teaspoon fine sea salt
optional: gluten-free sprinkles
optional: gluten-free cookies
optional: pink gel food color
Instructions
Funfetti Layer Cake
Preheat the oven to 350º F and prepare two 9-inch round cake pans with non-stick baking spray and parchment paper.
In a small mixing bowl combine the milk, avocado oil, eggs, vanilla, and almond extract. Whisk together and set aside.
In the bowl of a stand mixer and with the flat beater attachment, combine the flour, sugar, baking powder, salt, baking soda, and xanthan gum and give it a quick mix together for approximately 1 minute.
Add in the butter, each cube at a time, to the dry ingredients and mix on low until it looks like coarse sand.
Slowly pour in approximately half the liquid mixture from step 2 and mix on medium for 2 minutes.
Pour in the remaining liquid mixture and mix on low for 30 seconds. Turn the mixer off and scrape down the edges of the bowl. Turn the mixer to medium and allow to mix for another 2 minutes.
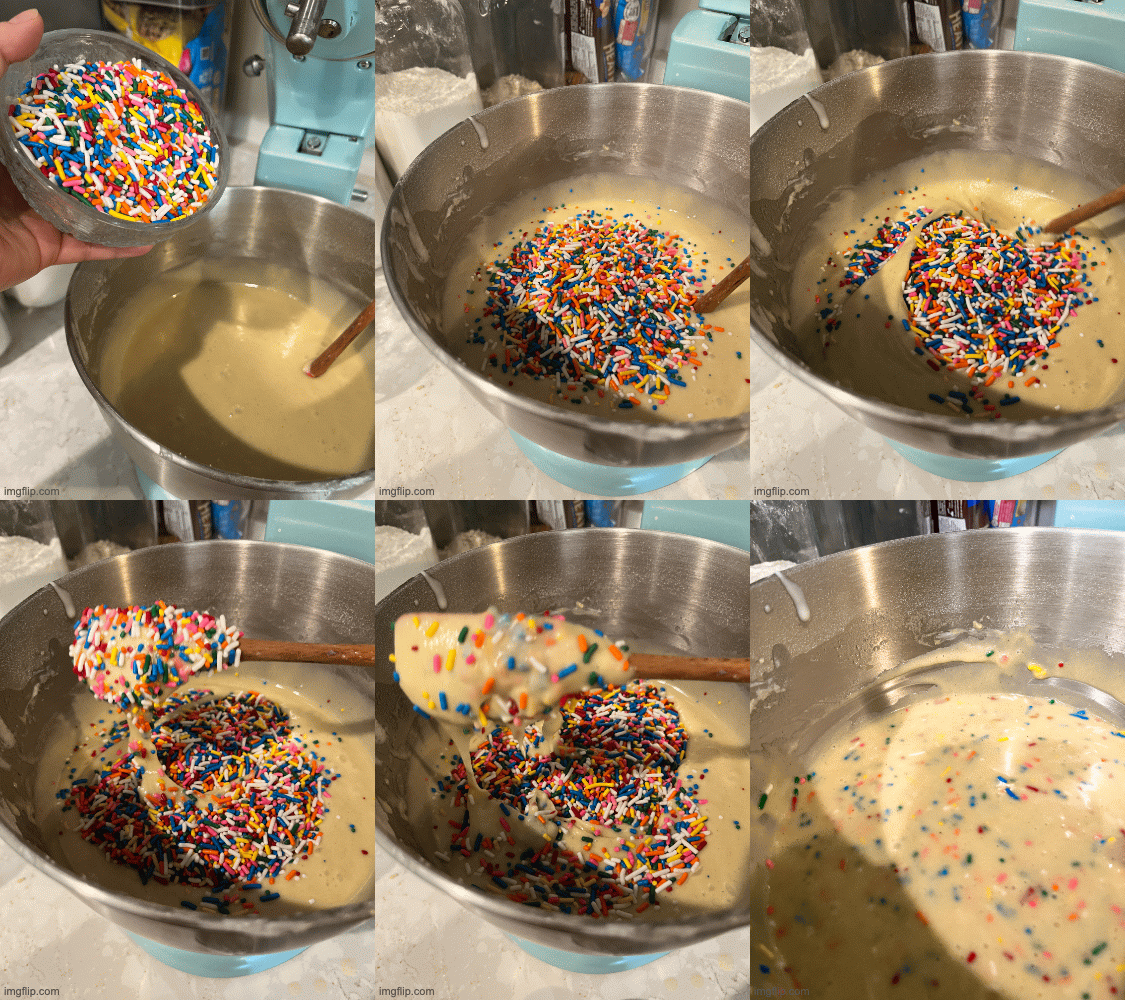
Add in the sprinkles and mix until just combined with a spatula.
Divide the cake batter into the three prepared cake pans and bake for approximately 25-35 minutes or until a toothpick inserted in the center comes out clean. The edges will be a light gold and begin to pull away from the cake pan.
Allow the cake layers to cool for 10 minutes and then invert them on a cooling rack to fully cool.
If you are not planning on baking and decorating on the same day, after on the cooling rack for 10 minutes, wrap each cake layer carefully with plastic wrap and place in freezer. You have a few days to take the cake out and ice it. Make icing just before taking the cake layers out of the freezer. The icing will harden while you are icing i. Do not worry because it will thaw out in the next 30 - 40 minutes and you can smooth out any mistakes.
Vanilla Buttercream
In the bowl of a stand mixer with the paddle attachment cream the butter on high speed until light and fluffy. Approximately 10 minutes.
Add in the icing sugar, vanilla extract, and salt and mix on low until combined. If using pink or any other food color, add it in now.
Turn the mixer up to high and let mix for 5 minutes until smooth and creamy. Scrape the sides of the bowl when necessary.
Cake Assembly
Level each fully cooled funfetti cake layer with a cake leveler or knife if needed.
Place one layer of funfetti cake on a cake board, plate, and/or cake turntable and top with approximately 1 ½ cups of vanilla buttercream.
Repeat with the remaining layers and apply a thin coat of buttercream all over the cake. Refrigerate for 20 minutes.
Cover the cake with another layer of buttercream and smooth the sides with a cake smoother. Leave the top edge raw and unfinished or create sharp edges with an offset spatula. Level with the top of the cake, use the offset spatula to drag the buttercream top edge towards the center. Repeat this motion around the entire top edge of the cake.
Decorate the cake as you please. I used extra sprinkles to cover the bottom of the cake. Place the cake on a large cookie sheet to catch the extra sprinkles and gently, with the palm of your hand, press the sprinkles up against the bottom of the cake. I topped the cake with buttercream swirls using a Wilton 2D piping tip and placed a gluten-free cookie between each swirl. Enjoy!
Store leftover cake in an airtight container in the fridge for up to 7 days or in the freezer for up to 6 months.
Tips:
This cake can easily be made with regular dairy and glutenous ingredients. Make sure you go by the cup measurement and not the weight measurement when using regular ingredients.
* I used Kinnikinnick gluten-free all-purpose baking blend.
Original recipe from Caked by Katie


